
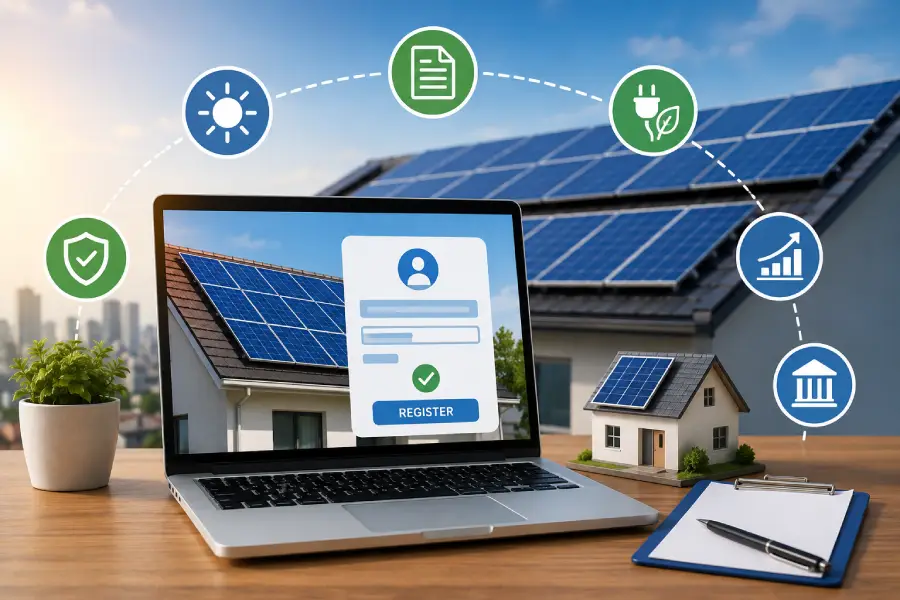
The portal provides a centralized online platform where homeowners can register, submit applications, choose approved vendors, monitor installation progress, apply for net metering, and receive eligible subsidies directly into their bank accounts through Direct Benefit Transfer (DBT). By eliminating paperwork and offering a transparent digital workflow, the portal has made rooftop solar installations easier than ever before.
Whether you are planning to install a 1 kW, 2 kW, 3 kW, or larger residential solar system, understanding how the portal works is essential. This guide explains every stage of the process, including eligibility criteria, required documents, subsidy details, installation steps, and practical tips to help you avoid delays.
What is the National Portal for Rooftop Solar?
The National Portal for Rooftop Solar is the Government of India’s centralized digital platform that streamlines the complete lifecycle of residential rooftop solar projects. Instead of dealing separately with local electricity distribution companies (DISCOMs), subsidy offices, and paperwork, homeowners can manage everything from one place.
The platform enables users to:
- Register online.
- Apply for rooftop solar installation.
- Select approved vendors.
- Track application status.
- Apply for net metering.
- Upload required documents.
- Receive government subsidy directly into their bank account.
The portal significantly reduces processing time and increases transparency by allowing applicants to monitor every stage of their application online.
Objectives of the National Portal for Rooftop Solar
The primary objective of the portal is to accelerate rooftop solar adoption across India by making the application and subsidy process faster, simpler, and more transparent. It supports the country’s renewable energy goals while encouraging households to generate clean electricity from solar energy.
Main Objectives
- Increase residential solar installations.
- Reduce dependence on fossil fuels.
- Promote clean energy generation.
- Provide financial assistance through subsidies.
- Improve transparency in approvals.
- Enable faster subsidy disbursement.
- Digitize the complete application process.
- Support India’s renewable energy targets.
Benefits of Using the National Portal for Rooftop Solar
The portal offers multiple advantages for homeowners, installers, and electricity distribution companies. By bringing every step into a single digital platform, applicants can avoid repeated visits to government offices and complete the process from the comfort of their homes.
| Feature | Benefit |
|---|---|
| Online Registration | Paperless application process |
| Vendor Selection | Choose approved installers |
| Subsidy Tracking | Real-time application updates |
| Net Metering | Integrated approval workflow |
| Digital Verification | Reduced paperwork |
| DBT Payment | Direct subsidy into bank account |
| Transparency | Track every approval stage |
How the National Portal for Rooftop Solar Works
The portal follows a structured workflow that guides applicants through registration, technical approvals, installation, inspection, and subsidy disbursement. Each step is monitored digitally, ensuring accountability and minimizing delays.
- Create an account on the portal.
- Select your electricity distribution company (DISCOM).
- Submit rooftop solar application.
- Receive technical feasibility approval.
- Select an approved solar vendor.
- Install the rooftop solar system.
- Apply for inspection and net metering.
- DISCOM verifies the installation.
- Commission the solar system.
- Receive subsidy directly into your bank account.
This digital workflow ensures that every stage—from application submission to subsidy payment—is transparent, trackable, and efficient.
Eligibility Criteria for the National Portal for Rooftop Solar
Before applying through the National Portal for Rooftop Solar, applicants should ensure they meet the eligibility requirements. The portal primarily supports residential rooftop solar installations under the Government of India’s residential subsidy program.
| Eligibility Requirement | Details |
|---|---|
| Applicant Type | Residential electricity consumer |
| Citizenship | Indian citizen |
| Electricity Connection | Active domestic electricity connection |
| Roof Ownership | Must have a suitable rooftop for installation |
| DISCOM | Connected to a participating electricity distribution company |
| Bank Account | Required for Direct Benefit Transfer (DBT) |
| Mobile Number | Linked with the application for OTP verification |
Who Can Apply?
- Owners of independent houses.
- Residential homeowners with a valid electricity connection.
- Housing societies (subject to applicable guidelines).
- Residents planning to install a new rooftop solar system.
Documents Required for Rooftop Solar Registration
Keeping the required documents ready before starting your application can make the registration process much smoother. Most information is uploaded digitally through the portal.
- Recent electricity bill.
- Identity proof (such as Government issued ID).
- PAN Card (if required by your DISCOM or bank).
- Address proof.
- Passport-size photograph.
- Bank account details with IFSC code.
- Cancelled cheque (if requested).
- Proof of rooftop ownership or occupancy (where applicable).
- Mobile number linked to the electricity connection.
- Email address.
Depending on your state or DISCOM, additional documents may be requested during technical verification or inspection.
Step-by-Step Registration Process
The National Portal simplifies the application process into a few easy steps. Applicants can monitor the status of each stage directly from their dashboard.
- Create your account using your mobile number and electricity consumer number.
- Select your State and DISCOM.
- Verify your details using the OTP sent to your registered mobile number.
- Log in to your dashboard.
- Fill in the rooftop solar application form.
- Upload the required documents.
- Submit the application for Technical Feasibility Approval.
- Wait for approval from your DISCOM.
- Select an empanelled solar vendor from the approved list.
- Complete the installation after receiving approval.
- Upload the installation and commissioning details.
- Apply for inspection and net metering.
- Receive subsidy directly into your bank account after successful verification.
Tip: Ensure that the name on your electricity bill, bank account, and identity documents matches to avoid delays during verification.
Government Subsidy for Rooftop Solar
The Government of India provides financial assistance to encourage residential rooftop solar adoption. The subsidy amount depends on the installed system capacity and is credited directly to the beneficiary’s bank account through Direct Benefit Transfer (DBT) after successful installation and verification.
| Solar System Capacity | Indicative Subsidy* |
|---|---|
| Up to 2 kW | Eligible as per current government guidelines |
| Above 2 kW to 3 kW | Additional subsidy as per approved rates |
| Above 3 kW | Maximum subsidy subject to applicable limits |
*The exact subsidy amount is determined by the latest Government of India guidelines and may change over time. Always verify the current rates on the official National Portal before applying.
PM Surya Ghar: Muft Bijli Yojana
The National Portal for Rooftop Solar plays an important role in implementing the PM Surya Ghar: Muft Bijli Yojana. The initiative aims to promote residential rooftop solar systems across India by providing financial support and simplifying the installation process through a single digital platform.
Eligible households can use the portal to submit applications, obtain technical approvals, select approved vendors, complete installation, and receive subsidies through a transparent online process.
Choosing an Approved Solar Vendor
Only empanelled vendors listed on the portal should be selected for installation. Approved vendors meet technical standards defined by the relevant authorities, helping ensure quality installations and eligibility for subsidy benefits.
- Compare multiple vendors.
- Review installation experience.
- Check warranty terms.
- Confirm after-sales support.
- Ask about maintenance services.
- Verify equipment specifications.
- Request a detailed quotation before finalizing.
Rooftop Solar Installation Process
After receiving technical feasibility approval, the installation can begin. A standard residential installation typically follows these stages:
- Detailed rooftop inspection.
- System design and capacity planning.
- Mounting structure installation.
- Solar panel installation.
- Inverter installation.
- Electrical wiring and safety checks.
- Performance testing.
- Upload commissioning details to the portal.
- Inspection by DISCOM.
- Net meter installation and system activation.
Understanding Net Metering
Net metering allows homeowners to export excess electricity generated by their rooftop solar system to the electricity grid. The exported units are adjusted against the electricity consumed from the grid, helping reduce monthly electricity bills.
| Without Net Metering | With Net Metering |
|---|---|
| Unused electricity is wasted. | Excess electricity is credited to your account. |
| Higher monthly electricity bills. | Lower electricity bills. |
| No compensation for surplus energy. | Better return on investment over time. |
Common Mistakes to Avoid During Registration
Many applications are delayed due to avoidable errors. Reviewing your information carefully before submission can help ensure a smoother approval process.
- Entering an incorrect consumer number.
- Uploading unclear or incomplete documents.
- Selecting the wrong DISCOM.
- Providing incorrect bank account details.
- Using an unregistered mobile number.
- Applying before checking rooftop suitability.
- Choosing a non-approved installer.
- Ignoring technical feasibility requirements.
- Submitting incomplete application forms.
- Not tracking application updates on the portal.
Best Practices for a Successful Application
- Keep all documents in PDF or image format before starting.
- Ensure your electricity bill is up to date.
- Use the same name across all official documents.
- Select a vendor only after technical approval.
- Take photographs of the completed installation for your records.
- Monitor your application status regularly through the portal dashboard.
- Complete inspection and net metering formalities promptly.
Rooftop Solar Cost Analysis
The total cost of a rooftop solar system depends on factors such as system capacity, panel quality, inverter type, mounting structure, installation charges, and your location. Government subsidies under eligible residential schemes can significantly reduce the upfront investment, making solar energy more affordable for homeowners.
| System Capacity | Suitable For | Average Monthly Consumption | Estimated Savings Potential* |
|---|---|---|---|
| 1 kW | Small households | 80–150 units | Moderate savings |
| 2 kW | 2–3 member families | 150–300 units | Higher savings |
| 3 kW | Medium households | 250–450 units | Significant savings |
| 5 kW | Large families | 450+ units | Maximum long-term savings |
*Actual costs and savings vary depending on electricity tariffs, sunlight availability, equipment quality, installation practices, and applicable government policies.
Return on Investment (ROI)
A rooftop solar system is generally considered a long-term investment. While the exact payback period varies by location and electricity consumption, many homeowners recover a significant portion of their investment through lower electricity bills over the system’s lifetime.
- Reduced monthly electricity expenses.
- Protection against future electricity tariff increases.
- Potential savings through net metering.
- Long operational lifespan with proper maintenance.
- Improved property value in many cases.
Environmental Benefits of Rooftop Solar
Installing rooftop solar panels not only reduces electricity costs but also contributes to a cleaner environment. Solar energy is renewable, produces no direct emissions during operation, and helps reduce dependence on conventional fossil-fuel-based electricity generation.
- Reduces carbon emissions.
- Promotes clean and renewable energy.
- Decreases dependence on fossil fuels.
- Supports India’s renewable energy goals.
- Encourages sustainable living.
- Reduces the environmental impact of electricity generation.
Rooftop Solar Maintenance Tips
Rooftop solar systems generally require minimal maintenance. Regular inspections and cleaning help maintain efficient energy generation.
- Clean solar panels periodically to remove dust and debris.
- Check wiring and electrical connections during scheduled maintenance.
- Monitor inverter performance.
- Trim nearby trees that may create shading.
- Schedule periodic inspections by qualified technicians.
- Track daily energy generation using the monitoring system.
- Address any unusual performance drop promptly.
Government Initiatives Supporting Rooftop Solar
The Government of India continues to promote rooftop solar adoption through digital services, subsidy programs, awareness campaigns, and renewable energy policies. The National Portal for Rooftop Solar simplifies the application process by integrating registration, technical approvals, vendor selection, inspection, and subsidy disbursement into a single platform.
These initiatives aim to increase residential solar adoption, reduce electricity costs for households, strengthen energy security, and support India’s transition toward cleaner energy sources.
People Also Ask
What is the National Portal for Rooftop Solar?
It is an official online platform that allows eligible residential consumers to apply for rooftop solar installation, track application status, complete required approvals, and receive applicable government subsidies through a centralized process.
Who can apply for rooftop solar subsidy?
Residential consumers with an eligible electricity connection and a suitable rooftop can apply, subject to the latest Government of India guidelines and DISCOM requirements.
How do I register on the portal?
Register using your electricity consumer number, mobile number, and basic details, then complete the application by uploading the required documents and selecting your DISCOM.
Is net metering mandatory?
Net metering requirements depend on applicable regulations and the approved system. It is commonly used to credit excess electricity exported to the grid.
How is the subsidy paid?
After successful installation, inspection, and verification, eligible subsidy amounts are transferred directly to the beneficiary’s bank account through Direct Benefit Transfer (DBT), subject to current government guidelines.
Frequently Asked Questions
1. What is the National Portal for Rooftop Solar?
A centralized online platform for managing residential rooftop solar applications, approvals, and subsidy processing.
2. Is registration free?
Registration on the portal is generally free. Installation and equipment costs are separate.
3. Can I choose my own installer?
You should select from the empanelled vendors available on the portal to remain eligible under applicable subsidy guidelines.
4. How long does approval take?
Approval timelines vary depending on the DISCOM, document verification, and technical feasibility assessment.
5. Can existing solar systems receive subsidy?
Eligibility depends on the prevailing government scheme and applicable rules at the time of application.
6. What is net metering?
It is a mechanism that credits excess electricity exported from your rooftop solar system to the power grid.
7. Do I need a bank account?
Yes. A valid bank account is generally required to receive subsidy payments through DBT.
8. Can apartment residents apply?
Eligibility for apartments or housing societies depends on the applicable scheme and technical feasibility.
9. How do I track my application?
You can log in to the National Portal dashboard to check the status of your application and approvals.
10. What happens after installation?
Your system undergoes inspection, commissioning, net metering (where applicable), and subsidy verification before payment processing.
Conclusion
The National Portal for Rooftop Solar has made the process of adopting residential solar energy more transparent, efficient, and user-friendly. By combining online registration, technical approvals, empanelled vendor selection, inspection, net metering, and Direct Benefit Transfer into one digital platform, it simplifies every stage of a rooftop solar project.
For homeowners looking to reduce electricity bills while contributing to a cleaner environment, rooftop solar offers long-term value. Before applying, review the latest eligibility conditions, subsidy guidelines, and technical requirements available on the official government portal to ensure a smooth application process.